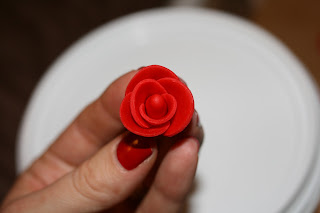
I wanted to give you a more detailed look at how I made the roses from the Vines and Roses cake in my last post. I was so disappointed that I hadn't taken pictures as I was making them, but I had some extra time today and a little practice is always helpful. I have red fondant that I thought would be perfect to demonstrate them with and a good way to start preparing for Valentine's Day.
 |
| First I rolled out the fondant on parchment paper using a mini fondant roller, approximately 8 inches long. |
 |
| I then cut out 10 discs using the wide end of a Wilton #126 piping tip. |
 |
The next step is to roll out a small cone from the fondant
which will serve as the support for the rose.
|
 |
| The first disc is molded around the cone leaving a small space between the cone and top half of the disc. |
 |
| The second disc gets molded on the other side of the cone and overlaps the edges of the first disc. |
 |
| This creates a small rosebud appearance. |
 |
| The next three discs are placed slightly higher then and overalpping the first two discs. |
 |
| With each layer I spread the top of each petal out to give the look of an opening rose. |
 |
| The third layer of 5 petals are placed around the cone. |
 |
| When the rose is complete, I pinch the base to remove any excess fondant and place it in a piping tip to harden. |
 |
| Here's a close up shot of the hardended rose. |
The roses will keep in an airtight container until you are ready to use them. Before placing them on the cake you can dust them with a little luster dust for a more finished look. These are fun to make and take only a few minutes to put together if you have all your materials ready to go.
No comments:
Post a Comment