Search This Blog

Monday, January 28, 2013

Fondant Roses


I wanted to give you a more detailed look at how I made the roses from the Vines and Roses cake in my last post.  I was so disappointed that I hadn't taken pictures as I was making them, but I had some extra time today and a little practice is always helpful.  I have red fondant that I thought would be perfect to demonstrate them with and a good way to start preparing for Valentine's Day.


First I rolled out the fondant on parchment paper using  
a mini fondant roller, approximately 8 inches long.


I then cut out 10 discs using the wide end
 of a Wilton #126 piping tip.
The next step is to roll out a small cone from the fondant
which will serve as the support for the rose.
                 
   
The first disc is molded around the cone leaving a
small space between the cone and top half of the disc.
The second disc gets molded on the other side of the
cone and overlaps the edges of the first disc.
This creates a small rosebud appearance.
The next three discs are placed slightly higher then
and overalpping the first two discs.
 With each layer I spread the top of each
 petal out to give the look of an opening rose.
The third layer of 5 petals are placed around the cone.
When the rose is complete, I pinch the base to remove any
excess fondant and place it in a piping tip to harden.
Here's a close up shot of the hardended rose. 

The roses will keep in an airtight container until you are ready to use them. Before placing them on the cake you can dust them with a little luster dust for a more finished look. These are fun to make and take only a few minutes to put together if you have all your materials ready to go.

Saturday, January 26, 2013

Happy 5 Month Birthday!

Happy 5 Month Birthday to my sweet little munchkin!  I can't believe she's 5 months old already...time is flying by!  This month I decided to do a winter theme for her cake.  I had frozen a 6-inch red velvet cake from Christmas Eve and had leftover icing from last weekend's Vines and Roses cake.  I dyed the icing with Wilton Sky Blue food gel and got this really pretty winter blue.  The snowman was cut from white fondant using gradutated circle cookie cutters.  I used black fondant for his eyes, mouth, hat and buttons and red fondant for the scarf and "5" on his hat.  I combined red and yellow fondant then added a dab of brown food gel to make the orange carrot nose. 


Once I put the snowman on the cake I thought it looked too blank around the edges.  I gave this cake two layers of icing; the first layer was to catch all the crumbs and keep them in place and the second layer was to give the cake a nice smooth finish.  A few crumbs managed to sneak their way in to the top layer so I wanted  to cover them up as much as I could. 


I first placed little white balls of fondant around the base to look like snowballs, but I thought it still looked like it was missing something.  I didn't want to overdecorate it and buttercream that I hadn't dyed and piped on snowflakes using a Wilton piping tip #26.  At first I was only going to pipe them on the top half of the cake, but once I started I couldn't stop!  I held myself back from piping them on the sides.  I think it added just the right amount of background detail. 


                          Here is the finished product, with photocredit again going to my husband:)


I was able to fully decorate the cake-from first icing to last snowflake in about 2 hours while my daughter took a nap.  I think this is my favorite in Emma's "month"day cake series yet!  Each time I make these cakes I think back over the past month and all the milestones that she's reached.  I feel like my heart will burst with love for this little munchkin. Even though she can't eat them yet, I love to think of her looking back on pictures of these cakes when she's older.  I hope it makes her feel special that mommy baked her a monthly memory to celebrate all her milestones.  I already have the next two cakes planned out which is usually half the battle...

Monday, January 21, 2013

Vines and Roses

So my secret project for the weekend was for a surprise 50th birthday party for my husband's aunt.  I had offered to make the cake and was given no direction except that she likes chocolate.  So I started thinking and planning what kind of cake it should be.  I thought about the milestone of turning 50 and how that comes with mixed emotion for people.  I decided not to focus on 50, but rather to come up with a classy, floral design instead.  The party was relatively small, only about 20 people, so I thought I would spend more time on the details then the size.


The first thing I did was try to nail down a color scheme.  I went to the craft store to pick up some supplies and found this beautiful black satin ribbon that I just absolutely love!  I decided to use this as my inspiration for colors and theme.


A few days before the party I set out making the fondant flowers.  At first I was making little morning glories that to go on the vines, but then I thought why not try some roses?  I had taken a cake class a few years ago and learned how to create roses from modeling chocolate, and I thought this would be the perfect cake to refresh my skills on.  If I had remembered this last week I would have used these for the cupcakes!  Oh well, next time...


So for the roses, I started with a small ball of fondant that I shaped into a cone.  I then cut discs of fondant using the wide end of a piping tip.  Each disc gets added to the cone in layers to create this really beautiful opening rose.  With a little practice I was cranking them out in no time.


The next day I baked the cakes.  I made two nine inch cakes and two six inch cakes.  Then came the buttercream.  Usually I make almond flavored buttercream when I make chocolate cake, but I had run out of extract.  Instead I use a mix of vanilla and orange extract.  It was a very mild flavor and it worked well with the cake. Finally it was time to level, ice, and fondant the cakes.  I used about 2 and 1/2 pounds of Wilton White Fondant rolled out to 1/4 inch thickness to cover both the 6 and 9 inch cakes.


So now I had two blank canvases to work on.  I originally thought of painting the vines on the cake, but when I mixed the food gel and water and practiced on a piece of fondant I thought it looked too flat.  So, I decided to dye the extra white fondant with Wilton Juniper Green and make the vines and leaves from that.  I rolled and cut long ribbons of the fondant which I then twisted to give the vines some personality.  It gave great dimension to the cake and stood up well to the flowers.  I cut the leaves freehanded using a mini fondant cutter.

So with all the elements completed it was time to assemble!  First I placed the vines on each tier using water to adhere them, then I placed the 6 inch tier on top of the 9 inch tier.  After that I attached the flowers and leaves.  Finally came the ribbon which I wrapped around the bottom of each tier and secured with a little dab of hot glue.  I cut the vines so they would either fall above or slightly over the ribbon.


So here is the finished product plated and photographed by my wonderful husband! 


I really love this cake.  Everything came together so well and I was so excited to bring it to the party.  It made me think of how far I had come from the first cake I made years ago and how my husband's aunt must feel looking back on her 50 years. I felt a little anxious while putting this cake together and so happy when I saw the look on his aunt's face.  This was meant to be a tribute in baking and I couldn't think of a better way to celebrate such a momentous occasion.  

Wednesday, January 16, 2013

And the winner is....

Not me!  Although I didn't win, I was very happy when I saw who took 1st place in the cupcake challenge.  Click on the link to see this amazing cupcake http://cakecentral.com/b/inspiration-challenge-winner.  The level of detail is unbelievable! Congratulations Nikki!

A new challenge was just posted today too.  This time it's for cookies with a tropical island theme.  The deadline is February 1st.  I think I have to turn up my game after seeing the entries for the cupcake challenge.  I'll keep you posted:)

Tuesday, January 15, 2013

Cupcake Challenge Cupcakes-Production Notes

So the cupcakes for the challenge are in the process of being judged. There were some amazing entries-   it's almost hard to believe they are edible!  My cupcakes were very simple (probably too simple), but as I mentioned in an earlier post, I don't expect to win.  I was just happy to set a short term goal and finish it!  It made me feel as though I had accomplished something, which these days is a great feeling! Anyway, I thought I would break down the production of these.  As any mom knows, anything you want to do with an infant to take care of requires planning and patience...


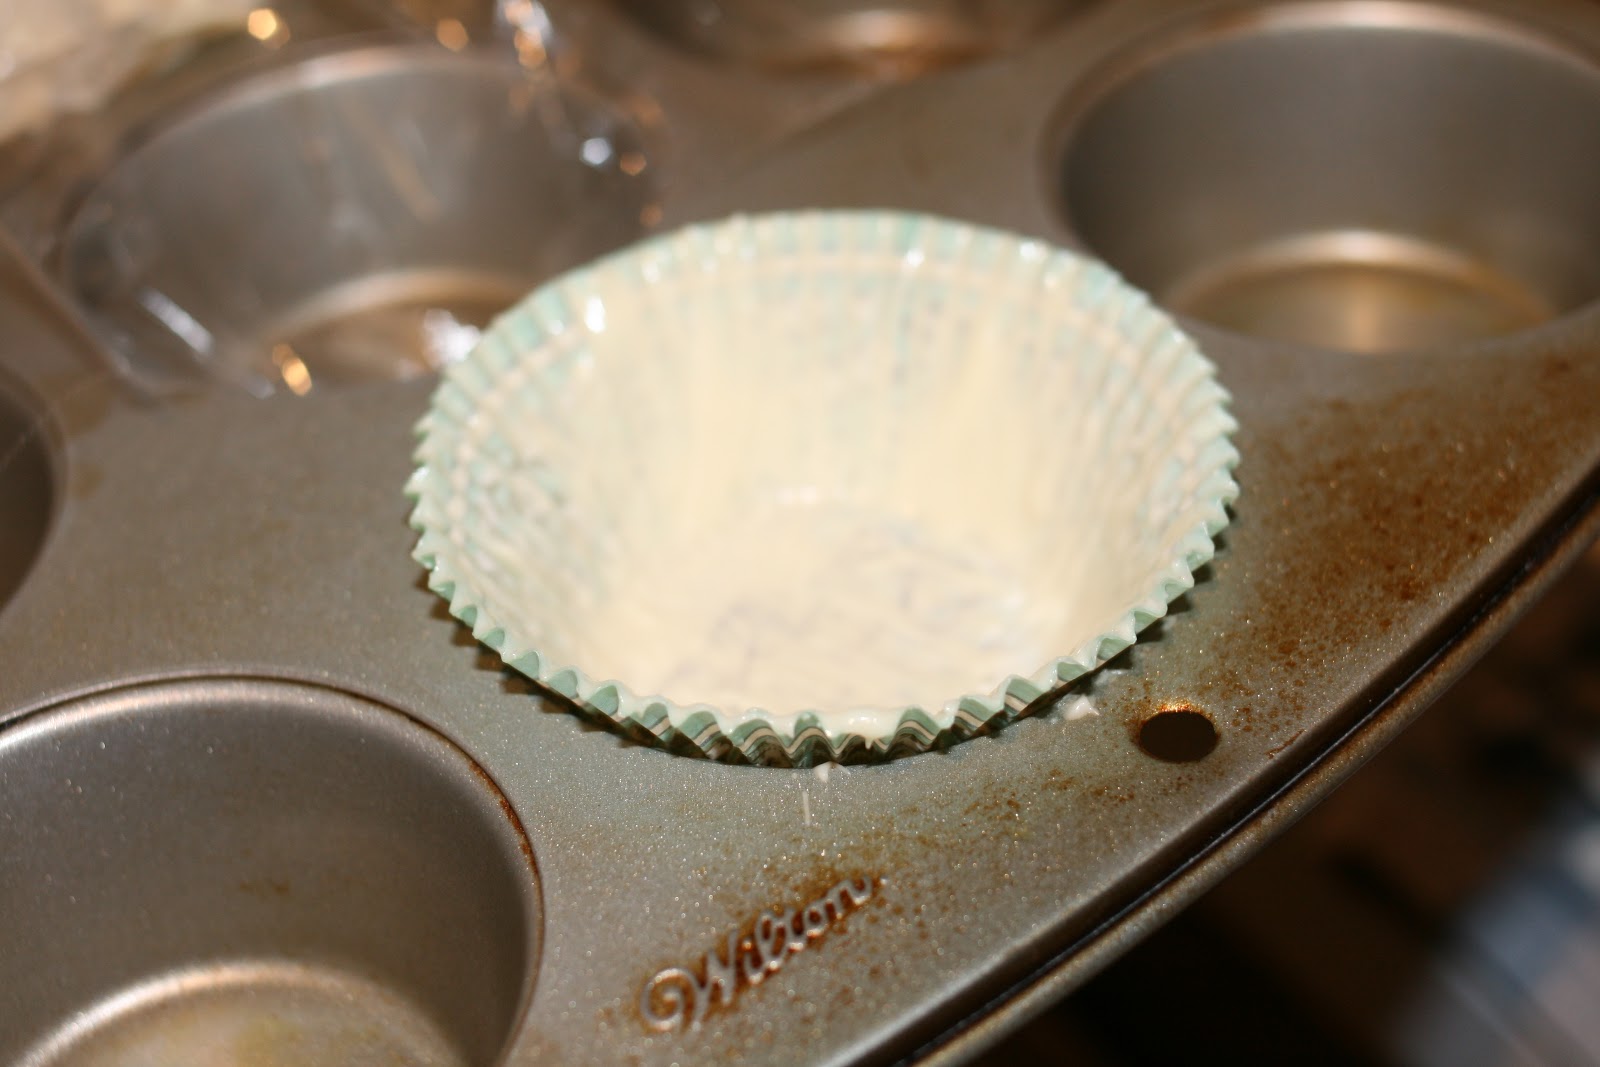
The first step was to make the white chocolate "cup" that the central cupcake sits in.  I did this a few days prior to decorating the cupcakes.  First, I melted down vanilla chocolate discs in a double boiler than brushed the melted chocolate into a cupcake liner that I set in a muffin tin.  I set the whole tin in the refrigerator to let the chocolate harden.  This doesn't take long, but I let it stay there for a while.  


I kept the liner on and didn't remove until I was plating the cupcakes.  In retrospect I should have brushed a second layer of chocolate to strengthen the shell. Mine ended up breaking while I was taking the paper off, but I was able to salvage half of it for the picture.


I baked the cupcakes a few days later while my daughter was napping:)  I used a basic Vanilla cake recipe from Wilton which I halved.  This gave me six regular size cupcakes and 12 mini cupcakes.  I wasn't going to use the mini cupcakes but I'm glad I made them because, as you saw, they ended up being a nice complement and filled up some empty space on the plate. I used gold cupcake liners for the minis and antique themed liners for the bigger ones.


I had some icing in the refrigerator from previous cakes that I used to decorate these. I just dyed the mauve cupcakes with food gel.  I piped the icing on using a star tip and piping bag.  The flowers are supposed to be lilies.  I don't have any flower presses yet so I tried to do the the best I could with my hands.  The blue lilies are fondant and the pink flowers are made from gumpaste which I dyed with mauve food gel.  The leaves are also gum paste dyed green.  I thought the colors were a great match for the colors of the challenge.  It isn't always easy to get the exact color you're looking for and you don't always know how they will photograph, but I think these were pretty close.  You can check the colors out here and tell me what you think http://design-seeds.com/index.php/home/entry/teacup-vintage.

At first I only intended on using the middle cupcake, but when I placed it on the cake plate (which as a side note was a gift from a friend and I absolutely love it!) it just didn't look right...to much empty space.  It also didn't help that the white chocolate "cup" broke as I was unwrapping it.  This was a good lesson in making sure you always have a back up!  So I decided to use the mini cupcakes and balance out the plate a little better.  I think it made for a pretty, understated presentation.  When I look at the picture, I just want to grab a cupcake and that's exactly how I hope other people feel when they look at it.  Of course, I must thank my husband for taking the pictures-he managed to fit this in even though he was working and had the flu!  That's true love:)

Although the cupcakes were simple compared to many of the other entries, I was pleased with the final product.  I don't do this professionally and I don't have an unlimited amount of time or resources to allot to these projects.  For me this was more about thinking of a project, feeling inspired and motivated, and baking something I would be proud of.  As my husband said, "It's not about winning, it's about participating."  I'll post the link to the Web site when they announce who the winner is.

I have another project lined up this week which I'm in the process of planning, but it's a surprise for someone so I don't want to give away too much info in case by some wild chance they read my blog:)

Sunday, January 13, 2013

Cupcake Inspiration Challenge Submitted!

Here is my entry for the Cake Central Inspiration Challenge!  I will be posting more production details in the upcoming week.  You can continue to check out all the entries at http://cakecentral.com/g/a/3282121/cupcake-challenge-1/


Saturday, January 12, 2013

Best Laid Plans

So the cupcakes for the cupcake challenge are finished and the photos are being processed.  Luckily my husband was able to snap some shots before going to work today so I'll be able to post them before Monday!  I had a whole plan for what I thought these cupcakes were going to look like and they ended up completely different.  It's a lesson I've learned before...you can plan everything out on paper, but when you actually start a cake project it tends to take on a life of it's own.  Colors don't come out the shade you planned, the icing isn't the consistency you thought it would be, the flowers you wanted to make by hand look less like roses and more like calla lilies-but somehow it works and sometimes even better than you could have imagined.  That's the beauty of making cakes.  While the actual baking requires a certain level of precision, the decorating can be spontaneous and really keeps you on your toes.  I've learned to not get too stuck on a design and to let the materials take the lead.  If you can't be flexible you can end up feeling like a failure and missing out on the joy of the creating. 

I'm happy with the way the cupcakes turned out.  Of course there are things I would change, but I'm usually my own worse critic.  I promised myself I wouldn't look at the other entries until I finished mine.  I didn't want to be influenced by any of the other designs and I also didn't want to be intimidated.  There were only about a dozen entries when I looked last, but the deadline isn't until Monday the 14th so I'm sure more will be posted over the weekend.  Check out all the great entries at http://cakecentral.com/g/a/3282121/cupcake-challenge-1/.  Stay tuned for the pictures of my entry! 

Tuesday, January 8, 2013

Next Project: Cupcake Challenge!

I love to bake, but let's be honest, unless you have somewhere to go or a specific event to bake for, coming up with inspiration can be challenging.  Of course, I never need an excuse to bake, but it helps to have an audience in mind.  Enter the Cupcake Challenge!  For the past two years I have posted pictures of my cakes to the Web site Cake Central (www.cakecentral.com).  As I was uploading my recent pictures I came across a posting for a contest to design a cupcake based on a vintage teacup.  (You can check out the posting here: http://cakecentral.com/b/inspiration-challenge-cupcakes.)  I've never entered a contest before so I'm a little nervous, but I thought it would be a good theme to challenge myself with.  These days I'm looking for anything that gets me excited to get in the kitchen and start experimenting!  The contest deadline is January 14th so I don't have much time, but I do have some ideas on where to begin.  I'll post all the steps as well as the finished product here on January 14th so check back to see what I come up with.  Oh, and the winner will be featured in an upcoming issue of Cake Central's magazine.  While I truly don't expect to win it would be a great treat!

Monday, January 7, 2013

Happy New Year!


What better way to ring in the New Year than with family, friends, and a cake?  I hadn't planned on making this cake.  I was organizing my supplies and realized that I had some materials that were going to spoil soon and I hate seeing things go to waste.  So I thought what better way to use them up than to make a cake.  As I was designing this cake I found myself reflecting on all the wonderful changes that have happened in my life during the past year.  I am so excited to find out what 2013 has in store and I thought a countdown clock cake was a great way to capture that anticipation.

This is a two layer 9-inch chocolate cake filled with almond buttercream and cherry preserves.  I've never used preserves in a filling before, but the combinations of flavors was delicious!  The cake is covered in and decorated with vanilla fondant.  I made a mirror ball out of a styrofoam ball and silver embellishments at my niece's request for her birthday cake several years ago and I just loved the way it came out.  I have kept it in a little container with my supplies just in case I ever needed it again (because you never know when you'll need a 3 inch mirror ball:)  As I was decorating this cake I remembered that little ball and thought what a great addition!  I painted the pole it sat on top of with black food coloring to finish it off.  If only I could have made it really move down the pole, maybe next year... :) So here it is, the last cake I made of 2012.


Happy New Year!

And it begins...again!


Little Miss with her 2 month cake-Banana
cake with cream cheese icing

So my intention of starting this blog over a year ago was sincere, the actual execution of it was another story.  Since my first post there have been many life events that have veered this blog off course.  My husband changed jobs which entailed relocating from the city to the suburbs.  Needless to say the move was extensive and time consuming, but extremely worthwhile.  But the most exciting event was finding out that we were expecting our first child!  Emma was born this past August and she has changed our lives in ways we could never have imagined.  With the arrival of the New Year I thought this was the perfect time to resurrect the blog I wanted to start so long ago.

I am currently on maternity leave and, needless to say, all of my time has been consumed with her care; but, I have still found time to bake and more importantly she has provided a wonderful new source of inspiration.  As she has gotten older I have found myself having a little more free time.  The most important part is planning in advance and breaking the whole cake production into small steps.

When Emma was born I decided to commemorate each month of the first year of her life with a cake...of course I took this challenge on BEFORE having a newborn and realizing that my time would never be my own again, but I was determined to do this for her.  Even though she is too young to enjoy the actual cake, I love the idea of her being able to look back at each month of her first year and realize that we truly celebrated each month and all the important milestones she reached.  It also gave me an external goal to focus on and deadline to meet which I truly enjoy.  Some cakes have been better than others, but overall I'm just happy to make them.

Emma is now four and half months old, so I thought I would post the first four cakes in this post and then devote one post for each of the cakes to come.  I haven't decided on a theme for her 5 month cake and suggestions are certainly welcome!


This was Emma's first cake.  It is a 6-inch double layer chocolate cake with buttercream icing and fondant accents.  


This cake almost didn't get made on time!  It was another 6-inch double layer cake but this time I made vanilla cake with almond buttercream icing.


Emma was born on August 24th which meant her  four month birthday fell on Christmas Eve.  I took that and ran with it:)  This was a red velvet cake with green cream cheese icing and fondant lettering.  I didn't split the cake and I only iced the top creating more of a giant cupcake appearance.  The surrounding mini cupcakes are also red velvet and topped them with crushed peppermint candies.


I should also note that my husband is the photographer in the family so when the pictures look professional it's most likely because he took them.  Unfortunately that isn't his day job, so on the occasions when he isn't home I attempt to capture the cakes...you can probably tell which of the above pictures I took:)